Follow Me on Pinterest
Showing posts with label Pinterest. Show all posts

Thursday, January 3, 2013

Oragnization in the mist of paper confetti

Today I have a helper who is eager to learn all about organization. Okay, the truth is, if I get out my computer, Little B gets out his and then signs for me to "sit". He likes to work alongside mommy, but working is hard, so a snack is always needed.
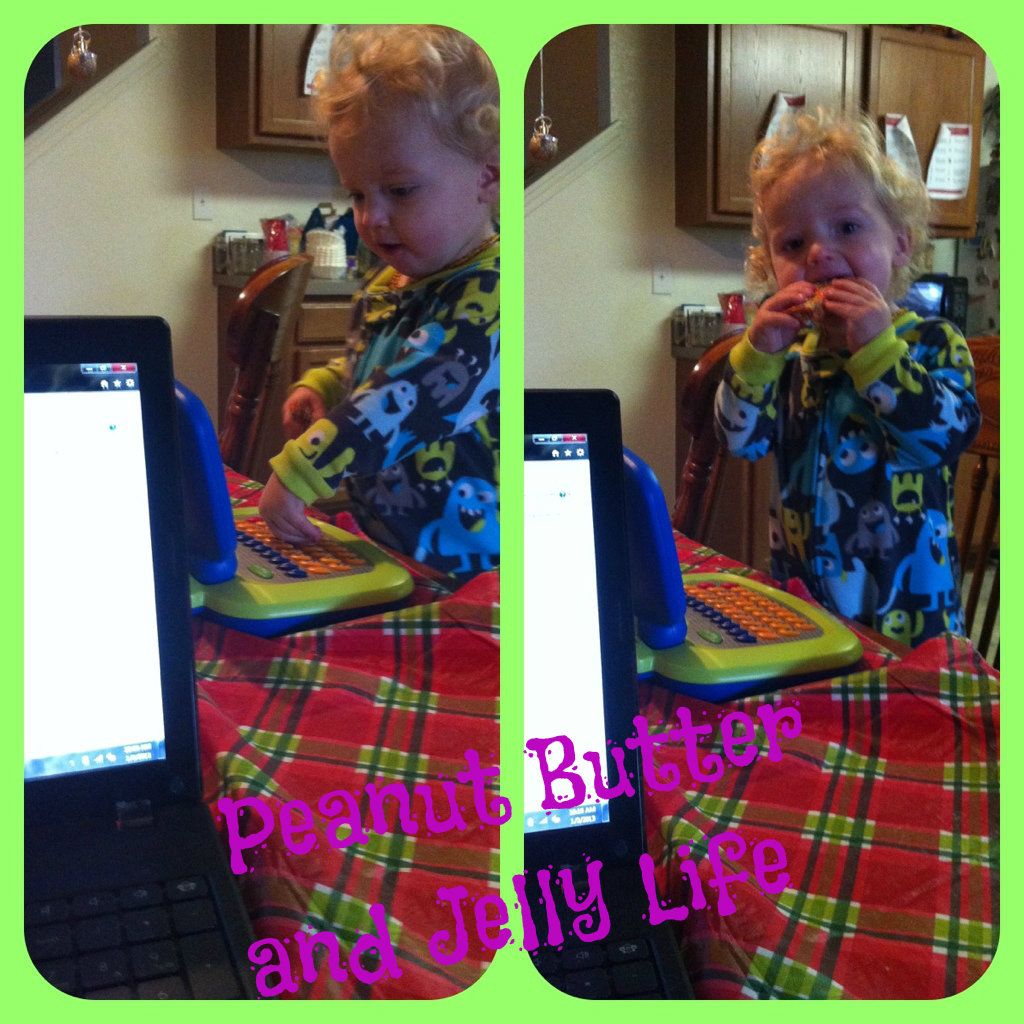
 
 
Yesterday I sat down 4 times to write a blog post about organization and my quest to have a better organized home by the end of 2013. Each time I sat down, inevitably one or the other child would need something. At one point, I was doing the chores list I printed out. I was going along, checking off things and feeling accomplished. I was one proud peacock, until I turned the corner and saw that both kids had found the one confetti stick from New Year's Celebration at the Children's museum. For whatever reason I had put one of the confetti sticks, still full, into the diaper bag and carried it home. I'll stop here and mention that it never fails, my diaper bag is a variable "Mary Poppins" carpet bag. I promise, sometimes I pull out lamps and mirrors from the very bottom...... maybe even a potted plant or two.
 
I digress. One of the kids, the youngest dirtiest one, found this stick and was shaking it. A few pieces of tissue paper confetti came out. This prompted the other one, the larger less dirty one, to grab the stick and shake it hard. There was a loud POP and BAM! Confetti everywhere. Both kids thought this was a perfect way to spend a few minutes and proceeded to throw the confetti around. I, however, looked on my carefully thought out chores list for "clean up confetti", sadly it was on there. I think the original author is missing out on not cleaning up confetti. It wasn't until last night, when I, at 2:30am finally crawled into bed, found more confetti on my side of the bed. Apparently the stairs were not enough to contain this awesomeness, and one of the kids felt the need to stuff our covers with it. It was like a party happened in our bed and I was the last to arrive. Sigh.....
 
Anyway, what's the point of today's post? Organization? Oh yes, that's right. I was on my favorite site PINTEREST!!!! Pinterest oh how I heart thee.
 
I'm on Pinterest in preparation for my organizational trip this year. I stumbled across a few "Home Management" binders with free printables and great ideas. I started thinking "why yes, I do believe I can put together a home Management Binder". I came across a really great article on Money Saving Mama. she has several free printables to add to a home binder. I say, go check it all out and use what will work for you. Today, I'll walk you through my first few pages.
 
I mainly used this one site for the majority of my binder. This women makes organizational skills look effortless. I wonder if I should hire her to make me organized and therefore I will make it look easy? Hummmmm something to think about.
 
Anyway, the blog is called Organizing Homelife and she sure does. Here is the link to the beginning of her 31 Days of Home Management where she has all her printables for her binder. They all rock!!! Check out the link Here.
 
 
So to start, here is where I am at.
I used an old school binder from college way back when I went in 1778. It's the first binder ever made! LOL
 
 
So here I should mention that I am....... um thrifty? Okay, I'll admit it, I'm cheep. I didn't want to print out 365 pages of "daily chores" and "daily Plan of attacks" so I did what we do in homeschool. I made wipe offs the cheep way.
1 sheet of printed on paper
1 page protector
1 dry erase marker
 
TA-DA
(Jazz hands? Yes, I think it's warranted)
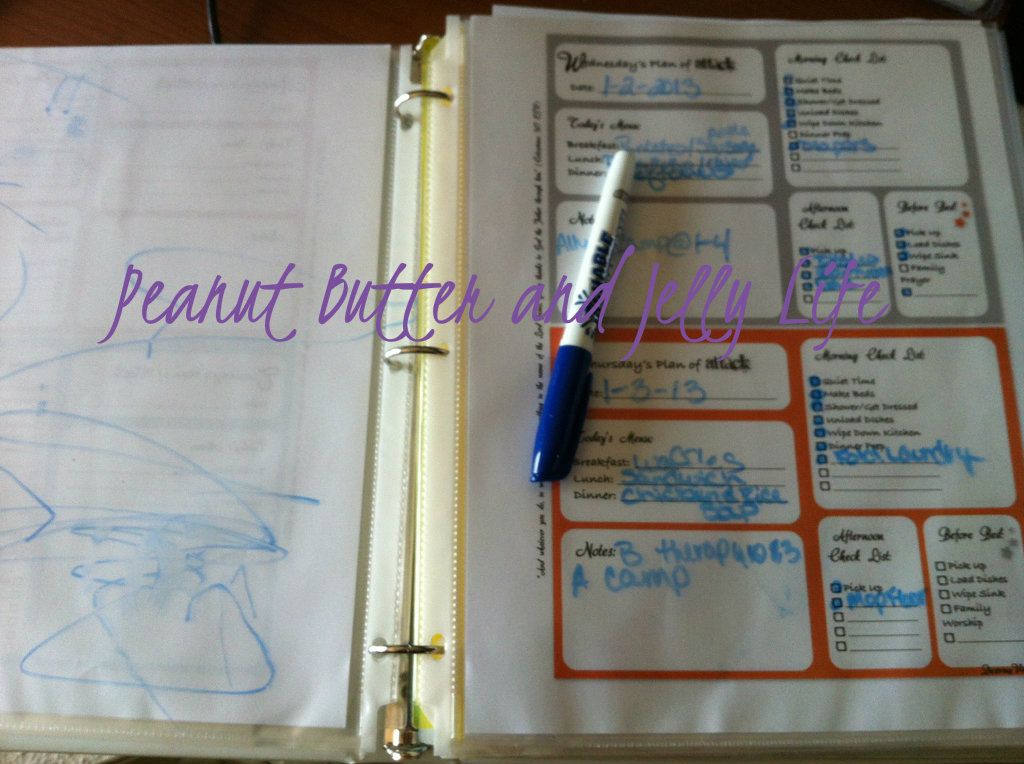
 
 I guess Little B either found the dry erase marker, or he has a plan of attack he wants known.
 
I printed out the "Plan of Attack" sheets from HERE in this LINK. I like these because it gives me a quick snippet of what the day will bring, what times things occur etc. Even having a place for me to plan out Breakfast, Lunch and Dinner. I know, I'm creative with my waffles and Leftovers.
 
These I covered in those page protectors and then, at the end of the week I just wipe it off and start over.
 
Money Saving Mom has a ton of Printables to choose from to make up what some Home Management binders may lack for you. While I mainly used one, I added some pages from here as well.
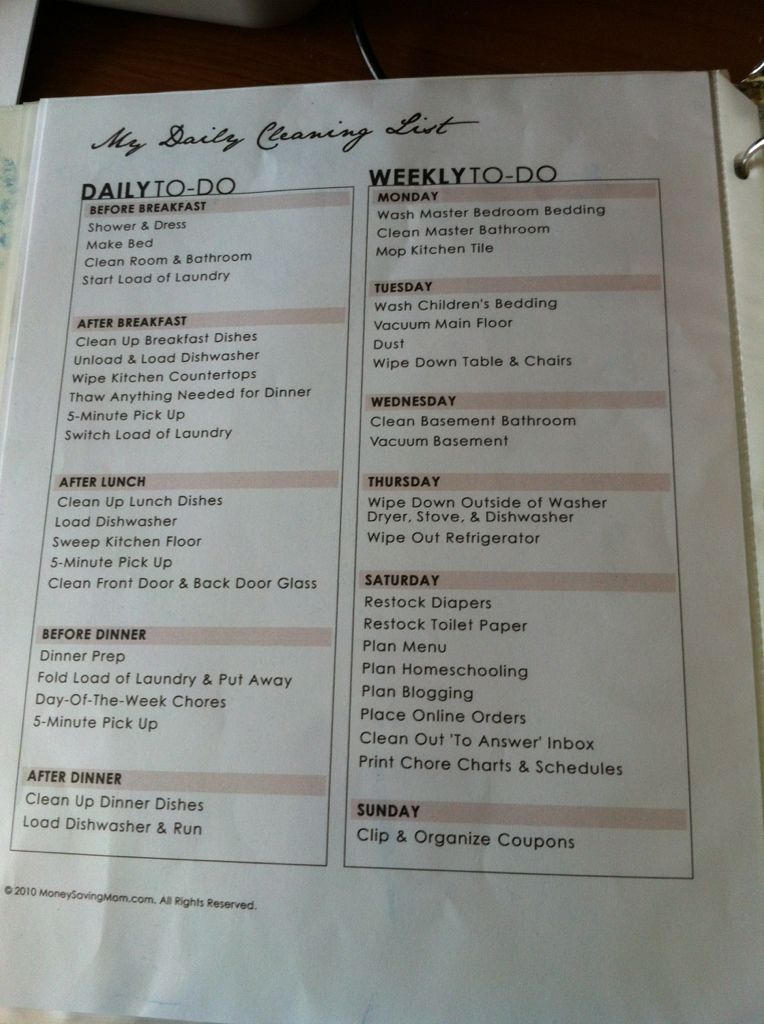
 
 
I am currently using her own cleaning list until I can come up with some of my own add ons. For now, she has a great stepping off point.
 
 
So there you have it, the start to my Home Management Binder. Tomorrow I'll show how I do my calendar, manage my blog ideas, and manage my ever growing to-do list.
 
Mama Jelly


Wednesday, February 15, 2012

Work Over My Wardrobe Wednesday


For the next few weeks, I will be making over my existing wardrobe. Being a stay at home mom of two small children, and living on a budget, I don't have the funds or resources to shop for me like I once did.  Gone are the days I could pop into the mall on the way home from work and purchase what I wanted to. No, our money needs to be spent wisely and we are saving for college and purchasing homeschool supplies along with an expensive Gluten free diet my daughter and myself need to stay healthy. I've been on a search for "new clothes" since I will be heading to South Texas Ladies retreat and I know there are going to be some nicely dressed women there. This will be my first time to go somewhere where I won't have spit up on my clothes or an Ergo carrier clipped around my waist. I won't have to worry about Miss A or nurse Little B during service. I am going to sit still (I am so excited about sitting still) and listen (this part thrills me more than sitting still) to women as they speak on family and service and God. I am beyond thrilled!!

So in my excitement, I started thinking about what I was going to wear. I am a mommy, but I try and dress nice, while still being able to go down a slide or finger paint if the need arises. But looking at my wardrobe makes me just a bit sad. My body has changed so much since having children and there are a lot of cute things I refuse to get rid of in my closet. I think every women can sing this song, mommy or not, working outside, inside the home or only with your children. We all have those outfits in the back of our closets that are a reminder of a time when we weren't called mom. A sort of tribute to the women we were and living proof of the women we are today.

I have come across a few tutorials that I love and have helped me to move my wardrobe from okay to fantastic! One of my favorite blogs ever is Choose to Thrive. This mom of 6 is facing 2 lay offs and budget cuts to the family budget but she manages to create for FREE and use things around her house. She is even remodeling her kitchen for FREE. I am smitten with her blog and get tons of ideas from her to, as Nike at Thrive coins "rock what you got". Stop by when you have a chance and tell her how amazing she is!

I have also been searching the Internet to include Pinterest (as if your surprised) for refashions of everything. I have tutorial after tutorial for turning your husbands' dress shirt into a little girl's dress, turn your old tshirts into scarves and ruffles and little girl dresses, turn that onesie with a stain into a onesie baby can wear, and so on and so forth. But what I haven't come across too much is turn mommy's old skirt into something new or turn Mommy's old sweater into a new sweater. I did come across this amazing ruffled long skirt blog post that I absolutely love. And I came across this blog post about refashioning your old sweatshirt into a nice asymmetrical jacket. So using my own imagination and these as inspiration, I bring you the ruffled sweatshirt re-do.


So lets start the refashion with the very first "Work Over My Wardrobe Wednesday".

I had the girls from the Pinterest Party (go here to read about the fun) leave the scraps from the tshirt scarves since I knew I could come up with something for them. This project was super easy and only took a few minutes to refashion a sweatshirt I picked up at "Closet Del Jelly". I like the feel of the fabric of the sweatshirt and the color, but I hated the over sized, bulky look. Plus an all black shirt, with no color washes my fair skin out. I need color!

What I love about knit material, is that you don't need to hem it, the more you wash it, the nicer it looks and it is a very forgiving fabric in that regard. However, you do need a special needle if you do knit material pieced with knit material, and the ability to stretch that makes it great for t-shirt scarves, also makes it difficult to work with if you don't have the correct tension on your machine.

I had my husband take these pictures and I am in no way a model. I prefer to take the pictures instead.

Here is the front


I ruffled t-shirt material around the hood and the v-neck. I didn't like the sleeve length, so I shortened the sleeves to be 3/4 sleeves.

Here it is with the hood up

Yes, I know I don't look "happy" but I was trying to not bust out laughing at Big B who was crouched and seconds away from falling over. This is me, biting my cheeks to not laugh.


This is a close up of the hood

And finally, the rolled roses on the pocket. I liked the pocket for holding things like "magical rocks" and special leaves for Tinkerbell's house as well as keeping my hands warm. I also added two colored roses to bring some other colors to the shirt.


I think it turned out pretty nice and will look nice while still being comfortable. I think this is a win/win.


So head to your local thrift shop, pick up some tshirts and a sweatshirt or better yet, refashion your own at home for FREE.


Mama Jelly


Sunday, February 12, 2012

A Pinteresting Party


A few weeks ago, while enjoying my favorite past time, I had a thought. Wonder if anyone has ever done a Pinterest Party. So I looked it up on the boards and of course they had and of course they pinned it.

So Smart!

My girlfriends and myself have enjoyed Pinterest almost to the part where we quote pins in our everyday language. "Did you see XX?" "I made XX last night and it rocked!" "I laughed so hard on that pin....." Etc etc. We don't even have to state where we found it, it's understood. PINTEREST. So I sent out the invites via Facebook, and got the girls together. This group would be a collection of different ages, different background, some have children, some unmarried but all with one love and all obsessed with one website.


So how would one go about having a Pinterest Party? I wasn't about to just sit on our laptops and our smart phones and pin for 2 hours. No that would not be fun. So in the invites I stated "Bring your favorite food pin, craft you made or anything else you got from Pinterest to the party." Then I thought, well, if we are all together, laughing, eating, being girls, we going to need to do something. So I thought it would be a ton of fun to make something off of Pinterest. I kept track for a week before the party and looked up "most popular" daily in crafts. There I found it! The week we had the party, the "most popular craft" was T-shirt Scarves.

What's a t-shirt scarf? Well my friend, it's the upcycle crazy meets functional accessory. Here with a cool tie died scarf. This one here is beautiful and being sold on Etsy. Elaborate ones found here and here. After looking up the last two, I think I am in need of doing some interesting redo's in the coming weeks.


So the big day approached and I got the decor and my food together. I also hit the Goodwill for some old t-shirts.


I put out a table with scissors and tshirts ready to be re purposed.


After the first pass of filling up our plates, everyone who brought some craft to show or brought foods, showed off what they had made. One of my sweet friends brought what could only be dubbed as the "Pinterest bag of crafts."  We then set to work redoing these shirts into wearable scarves.


While they worked, I brought out the special Pinterest Cheesecake.


Oh and friends ALWAYS help hold the braid


One of the ladies made these very cute picture props.


Some made the braided scarves, some just went off and did their own style. Everyone left having had fun and with something they created.


So go on, grab your girlfriends, gather that weeks "most popular craft", gets some food and have a great time enjoying the best site on the web.


Mama Jelly


Thursday, January 19, 2012

Crafty Day


I just love Pinterest for so many many many reasons. (sigh) My boards are full of sewing projects, homeschool information, "Cool Mommy Clothes" (coincidentally, I will have to find a cool mommy to wear all the clothes I have pinned. Working on it) and craft projects. Craft projects are my life line, my blood. I am never more whole than when I am crafting something, especially if it involves a toilet paper roll, Mod Podge or mason jar. When I'm stressed out or upset, something about the smell of a glue gun heating up makes me feel so much better. This trait has been passed onto my daughter in a big way. Every morning she wakes up, makes her way to my bedroom and after morning snuggles and kisses and laughter says "So mom, what are we making today." It is nothing for Big B to come home to a kitchen table covered in glue and glitter (Miss A lives and breathes glitters) and pipe cleaners. I am also the expert on removing said crafting "joy" from most surfaces. Hummm future blog post? Perhaps.

On this day I became ambitious and decided to tackle 3 craft projects. Yes, I love to craft. One of the reasons I love Pinterest so much is all of the ideas for crafting with your kids. It has everything from toilet paper and egg carton projects (This Dragon or these Flowers from egg cartons and these pumpkins from toilet paper rolls.) to painting and even how to display your children's masterpieces. I personally love this book where you can keep your little ones' art for years to come.

I got the idea this morning to reuse some of the junk... err.. I mean amazingly wonderful found objects from around the house. Being that we just moved and have been unpacking boxes..... Well okay, we moved a year ago but in our defence, I was on bedrest from 17 weeks until Little B came at 34.2weeks and then, well life with a newborn isn't really conducive to cleaning. Anyway, getting back to crafting, so I had these amazing items I was just going to throw into the trash.


 I grabbed the "Craft Box of Wonder" and some bubble wrap and hit my favorite site, Pinterest. Side note: I sure wish I could get a job pinning things. I'm seriously a pro! Any who, I plugged in "bubble wrap" into the search feature and voila!!! Instant project! WHOOP!

I pulled up this project and away we went. I knew that Miss A wouldn't be occupied for long with one project, so I typed in a random word "octopus" and came up with this cute pie project. I'm totally hooked now! So I dive into the Craft Box of Wonder, and pull out the items needed for said projects.

Items needed:
Paint
Brushes
Google Eyes/Puff Balls/Glitter Paint
Tape
Pipe cleaners
Construction paper


We started with the Bubble wrap picture. I was going to let Miss A just paint with the bubble wrap:


But she hit a creative streak and well, you just can't crush creativity.


The final I think is amazing. It sure speaks to me.... or at least it will until she wants to make another one.

So we set the bubble wrap artwork to the side to dry and then started on the Alligator or Crocodile, whichever. I first wrapped up the wrap in a "alligator" shape and had Miss A paint it.


While Miss A works on her alligator, I let Little B explore his inner painter


Of course he LOVED playing in the water, and then tipped it over and splashed in the puddle. Yes, he is a boy after all


By now her alligator is all painted and she is rather proud


We added foam feet to the bottom, but she decided to forgo the red stripe. She took artistic license with this piece.


We set that aside to dry as well since it's too hard to glue on eyes with wet paint. We moved on to the Octopus. I didn't have any toilet paper rolls on hand (GASP!!) so, this mommy in her cleverness, cut a paper towel roll in half. TA-DA!


I cut 8 slits into the bottom of the half of the roll and then let Miss A lose with her paint brush again.


I also let Little B lose with his brush and some water.


This little artist had enough of the critics and their mumbo jumbo and demanded a nap time to recoup and continue with this art at another time. Mommy "clap clap" nap time!!

Meanwhile, Miss A curled up the legs on her octopus and since she is such a loving big sister, on Little B's as well.


Miss A then, once the whole tube was painted, let it dry as well and decided this would be a great time to do some school work.


After both projects were nice and dry, we then glued on the eyes, and the mouth and of course no project is complete without glitter.


All in all, I think it was a nice and lovely morning spent channeling our inner artists.


Jelly Mama